2025/03/20Number of reading(6040)Number of comments(0)
I. Target Audience
Operations, Customer Service
II. Feature Overview
The Email Blacklist feature is designed for the bulk review request function. It filters out orders/ASINs/emails that should not be requested for reviews, helping sellers quickly and accurately request reviews and improve work efficiency.
Sellers can view and add new email blacklist entries here.
III. Use Cases
- Review Request Function (Automatic + Manual): Automatically exclude blacklist entries
- Receiving and Sending User Emails: Reject blacklist entries (Not yet developed)
IV. Operation Guide
1. Adding to the Blacklist
There are three types of entries for the email blacklist: Orders, ASINs, and Emails. After adding to the blacklist:
Order: Excludes emails for this specific order
ASIN: Excludes emails for all orders under this ASIN
Email: Excludes emails to this buyer's email address
Currently, there are only two entry points for adding to the email blacklist: Email Blacklist feature page + Order List. Among them, the Order List feature can only add order blacklists.
① Email Blacklist Feature Page:
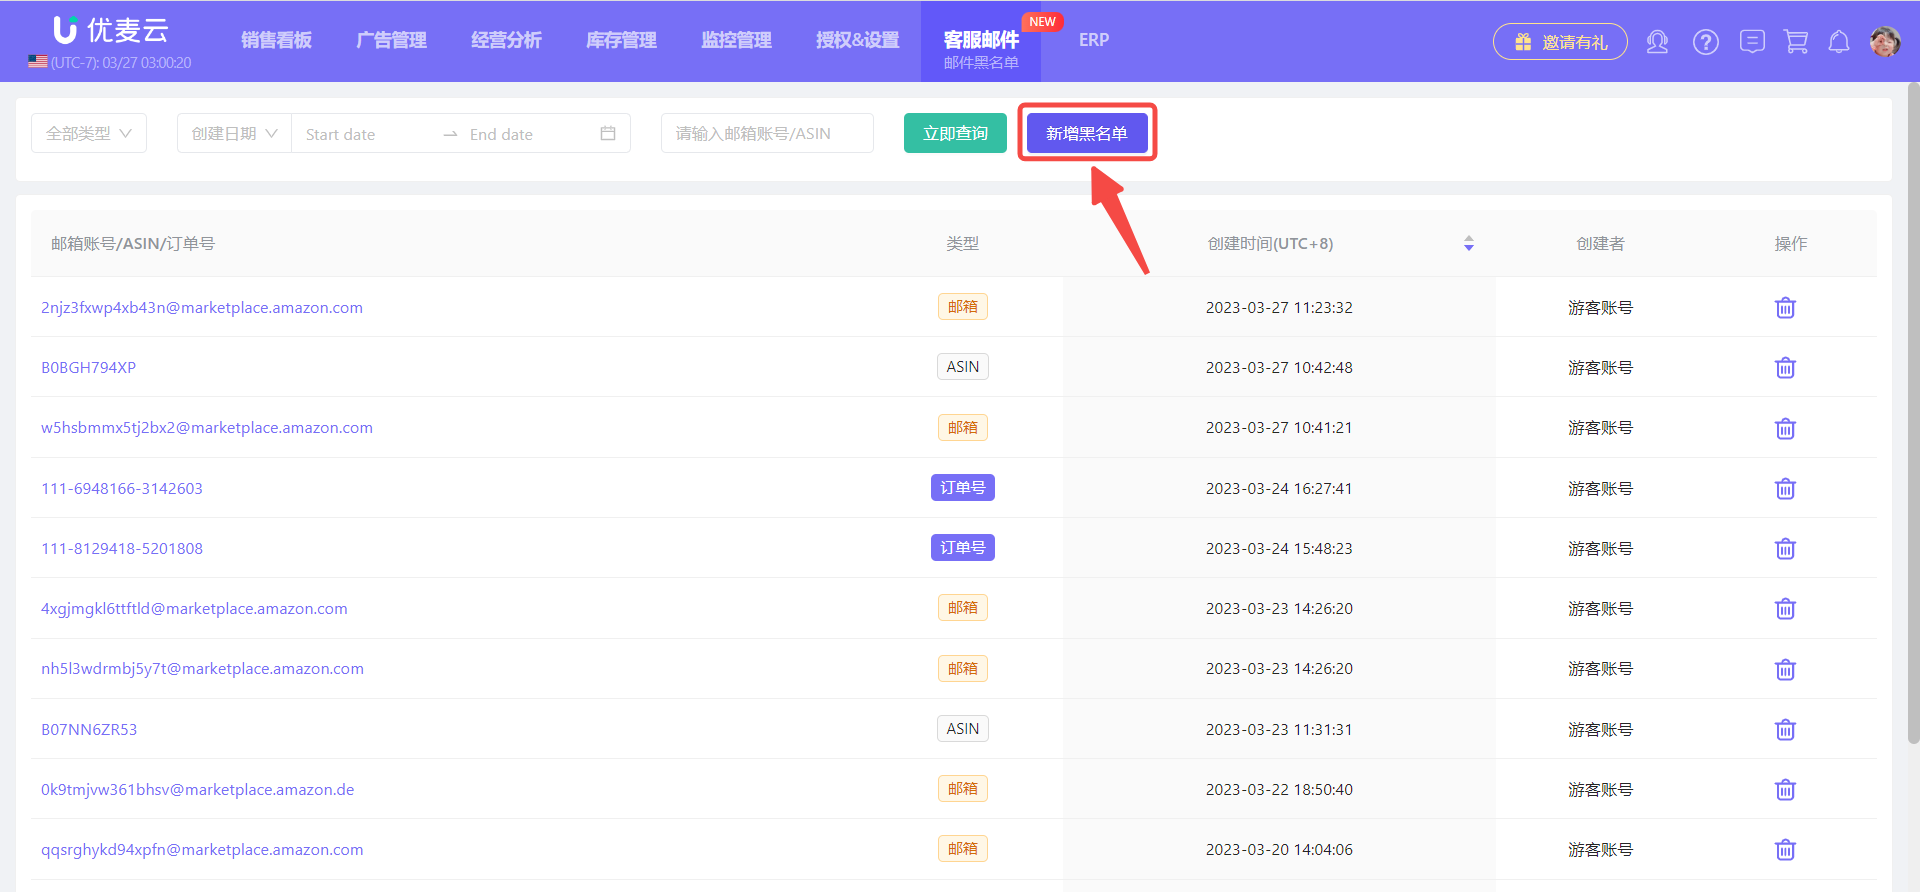
Go to the 【Email Blacklist】 feature page, and click 【Add Blacklist】 to enter the adding page.
 +
+
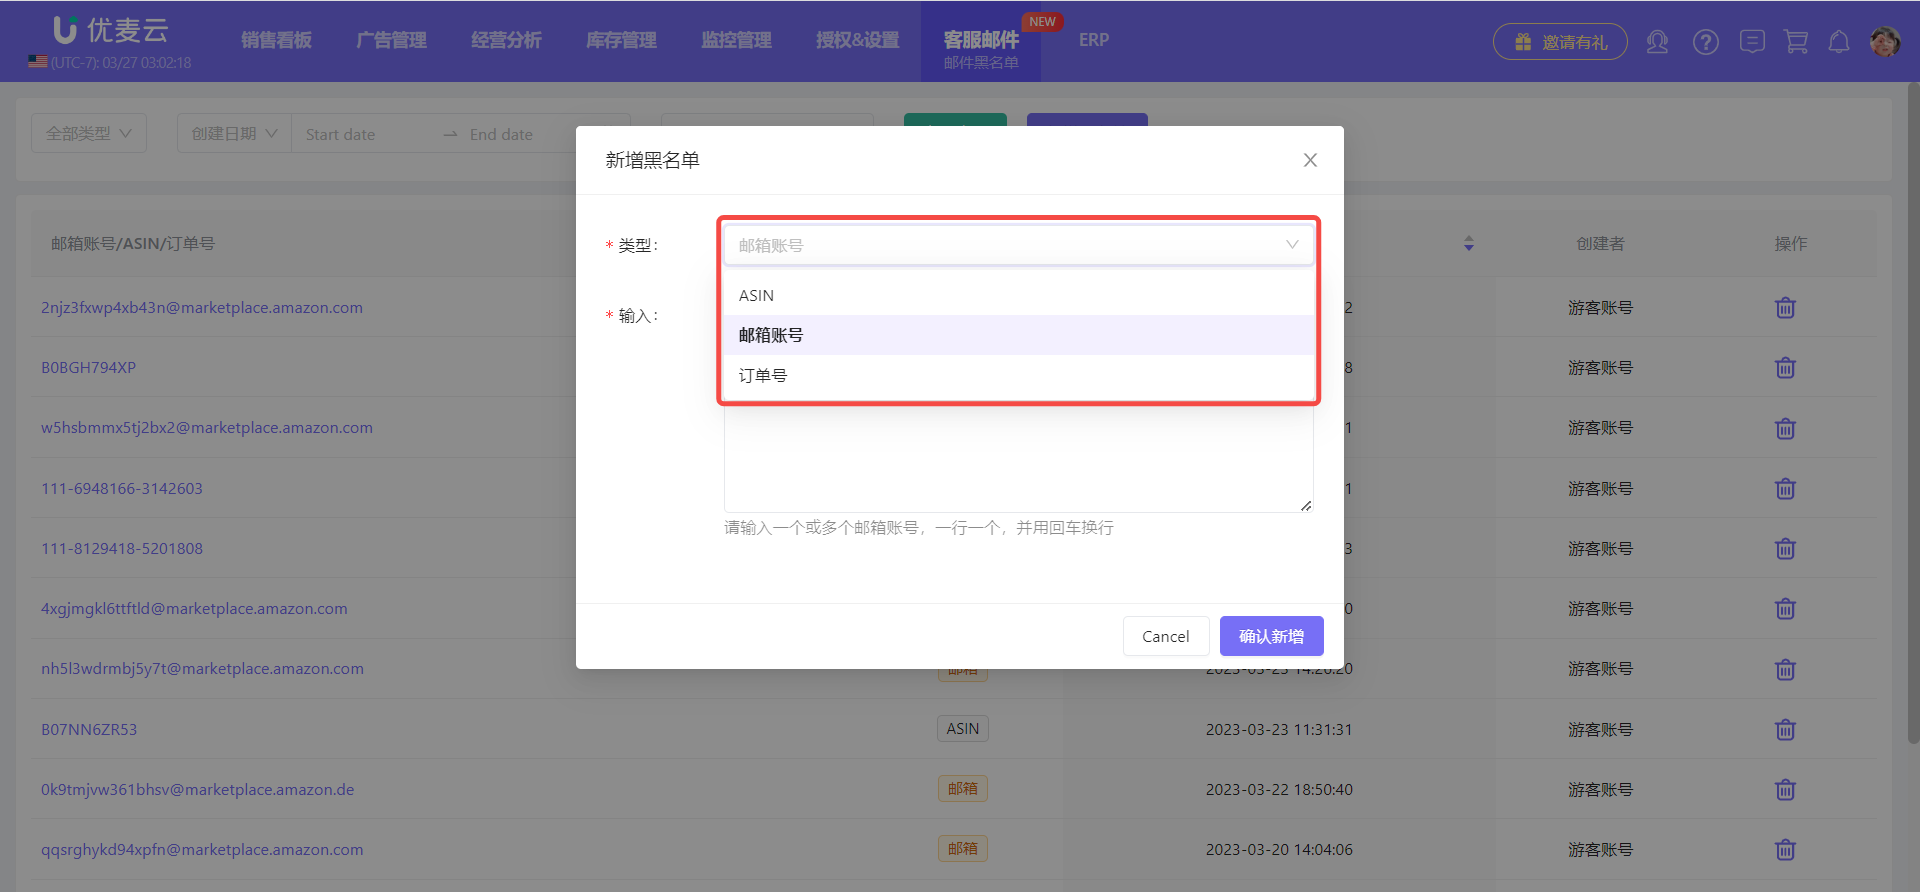
On the "Add Blacklist" page,
Select the type of entry to add: ASIN, Email Account, or Order ID.
 +
+
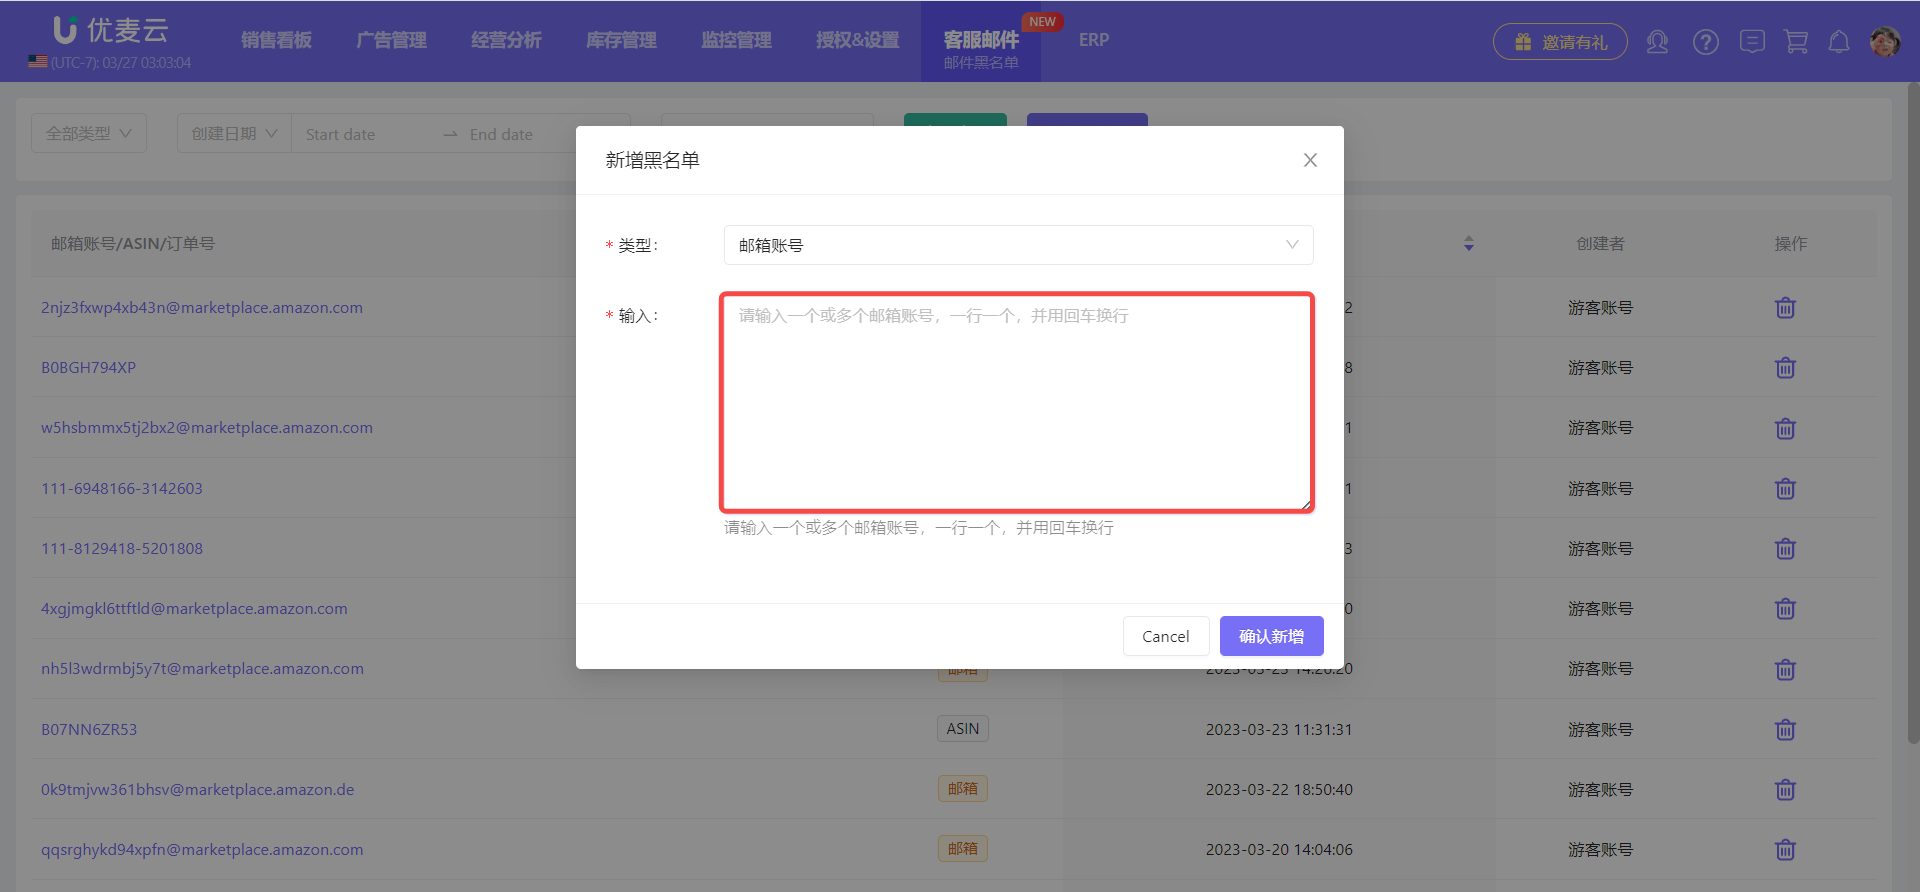
Then, enter the specific blacklist entry information, one entry per line.
 +
+
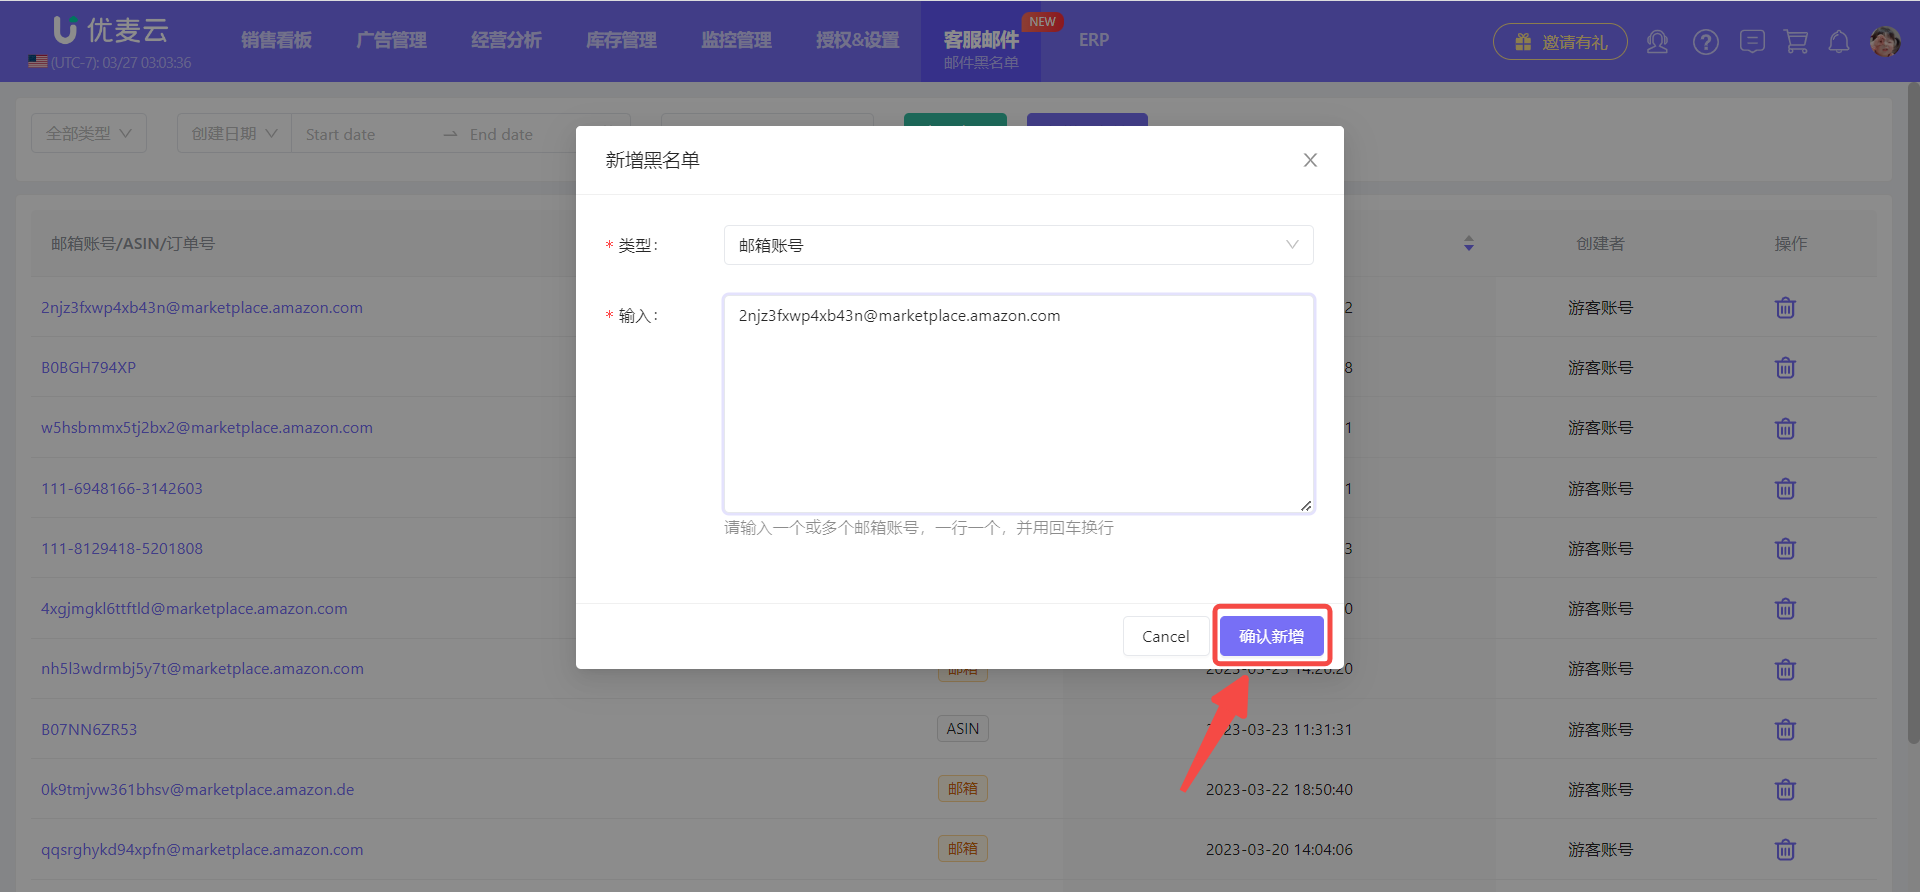
After confirming, click 【Confirm Add】 to save.
 +
+
② Order List (Add Order Blacklist Only):
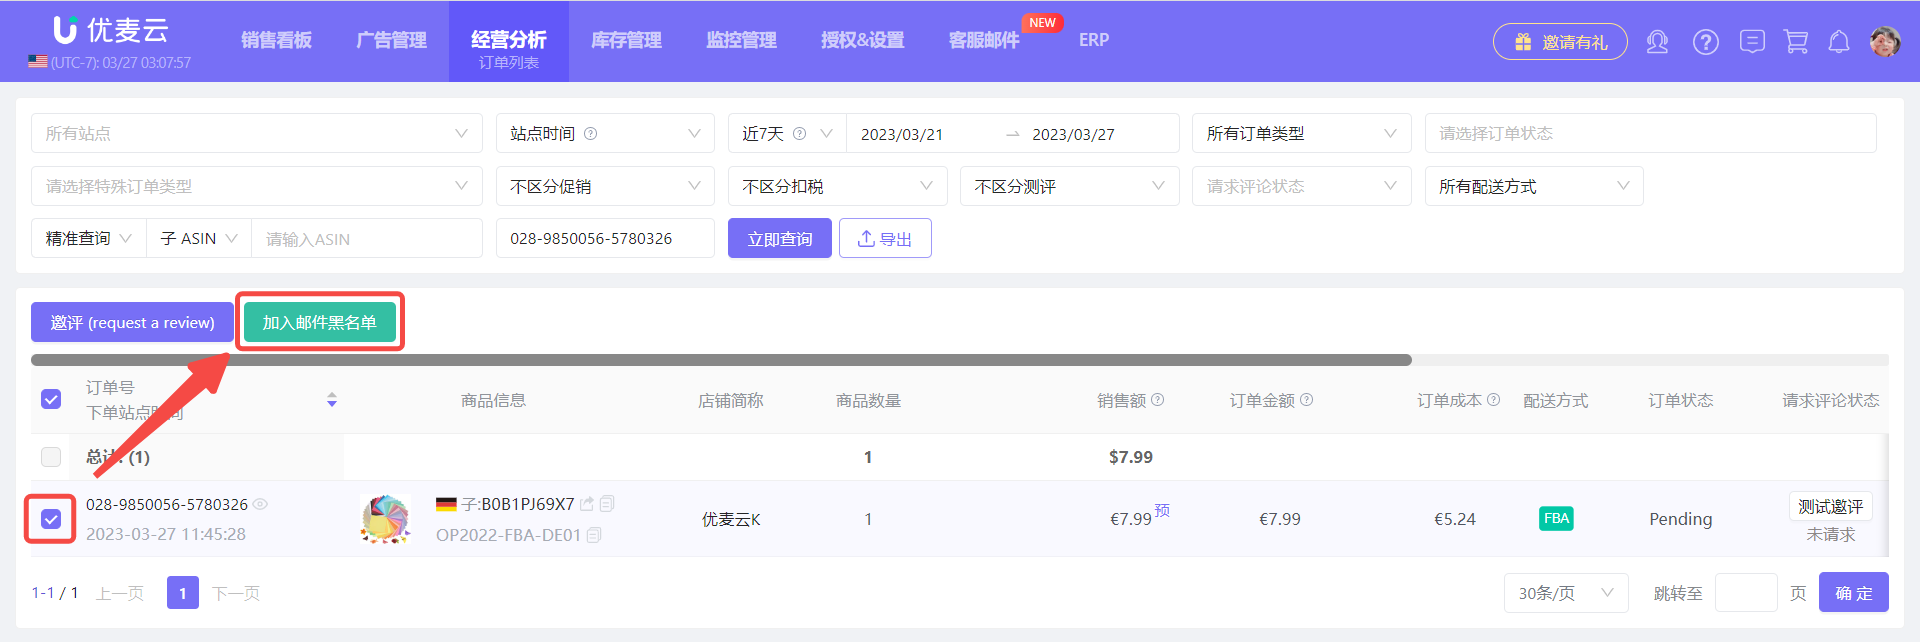
Go to the 【Order List】 feature page, filter and find the orders you want to blacklist, select them, and click 【Add to Email Blacklist】 to add them with one click.
 +
+
2. Finding Email Blacklist Entries
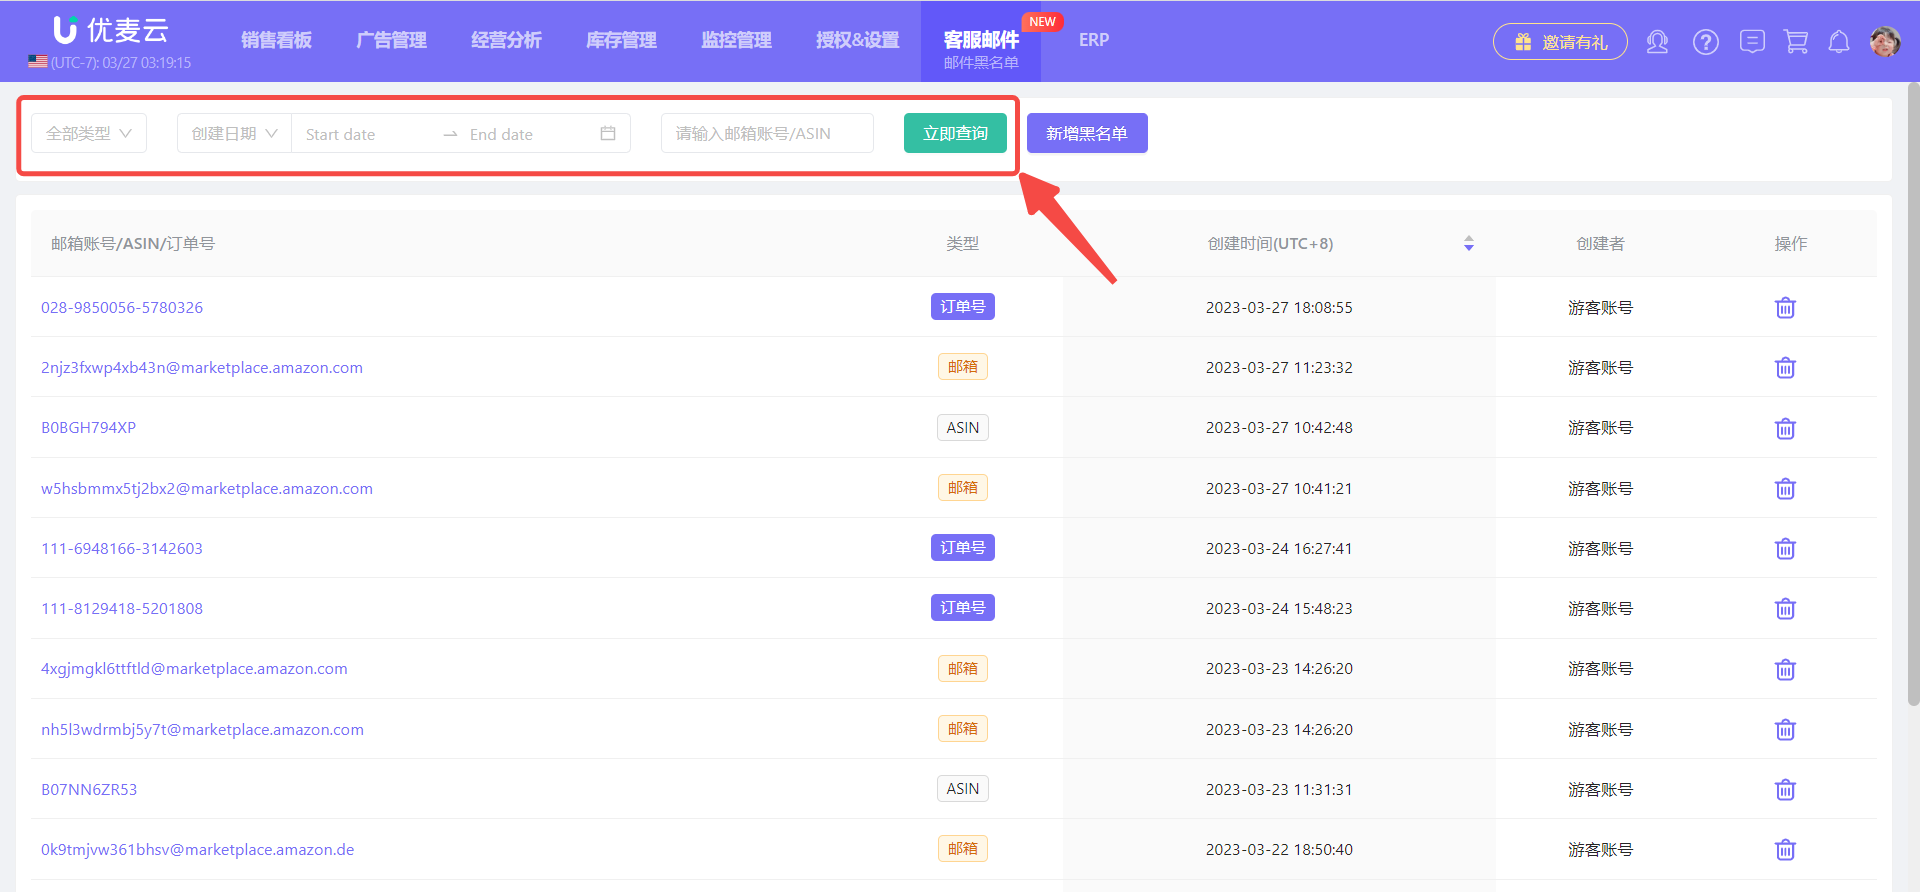
Once you have added entries to the blacklist, you can view all blacklist entries on the Email Blacklist page.
Use the filter bar to filter by entry type, add date, or individual blacklist entry to find the email blacklist you are looking for.
 +
+


